Overview
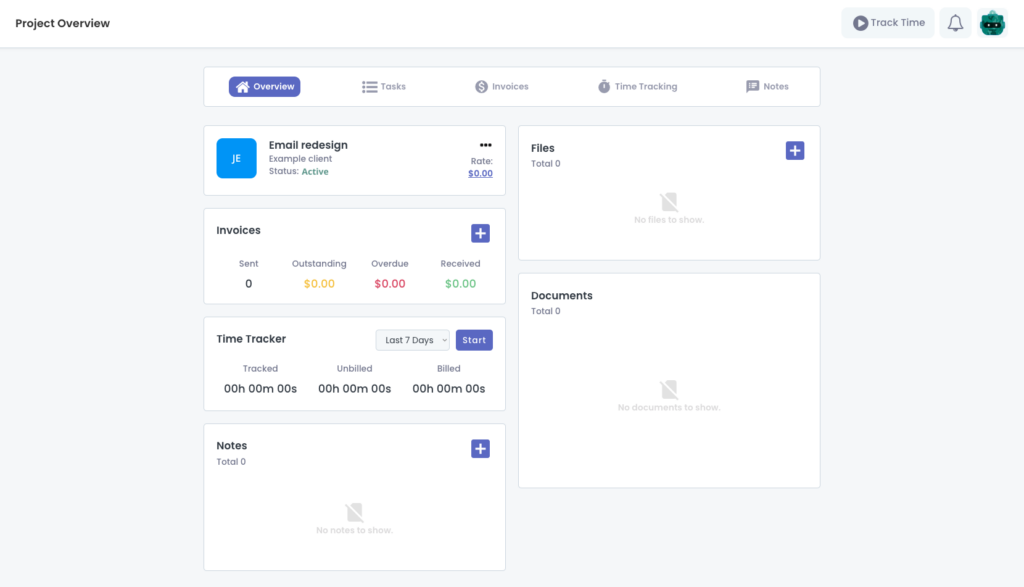
The project overview shows the most important information about this project. Here you can get a quick view of project settings, invoices, time tracker, notes, files, and documents.
Project settings
Each project has a little colored icon on the top left. The color of the icon is the color chosen for the client to whom the project is connected. Check out the client’s page to see how to change the icon’s color. It’ll either show the first letter of the client’s first and last name or the first two letters of the company name. The section also shows the status of the project as well as the rate, if you set one when creating the project. If you click on the rate, you’ll see a pop-up to edit the hourly rate and currency for this project. By clicking the three dots, you can change the status of the project from active to complete, archive, or delete the project. When you click edit, a pop-up will show where you can also edit the project name, client, currency, and hourly rate.
Invoices
In this section, you’ll see how many invoices you’ve sent out for this project. You’ll also find the invoice amounts that are outstanding, meaning an invoice wasn’t paid, yet. Received earnings, and overdue income are also tracked here. To create a new invoice for this project, click the blue + icon.
Time tracker
See how many hours you’ve tracked for this project under the time tracker section. The tracked time is the total time you’ve tracked for this project. The unbilled time shows the time you haven’t added to an invoice, whereas the billed time displays the time you invoiced so far. By default, the view is filtered by the last 7 days. You can also change the timeframe to the last 30 days, last month, this month, this year, last year, and all time.
Notes
This is the place to write down any meeting notes, thoughts, ideas, and instructions for the project. After clicking the + button, you can give your note a title to make it easier to find it again in the future. To see a note in detail simply click on one of the items in your list. You can also edit, and delete a note by clicking on the three buttons next to a note.
Files
Keep everything related to the project in one place. By clicking on the + button, you can upload any type of file, like designs, wireframes, or logo ideas. Click on one of the uploaded files to view and download it. You can also click on the trash icon to delete a file.
Documents
Two types of documents are saved here; proposals and contracts. It’ll show you the number of documents that relate to this project. To see a proposal or contract that was created for this project, click on one of the items.
Tasks
Keep track of the things you have to get done for this project under tasks. To add a task, click the “Add Task” button. Once you created a task, you’ll see the task name, a button to start time tracking, the project name this task belongs to, and the due date if you chose one during creation. By default, the view shows All tasks. You can also see tasks that are due today or tomorrow. You can check all the work you already completed by clicking done. Use the search box to look for a specific task. By clicking on the three dots, you can mark a task as complete, edit and delete it. On the left side, you’ll see three lines. Click and hold these to drag and re-arrange your task list. Click on the task name to see the task’s details. Mark a task as complete by clicking on the light grey square next to the task name.

Invoices
To find all invoices that belong to this project, click “Invoices” in the mini menu. Here, you’ll see the list of invoices you drafted and sent for the project. Listed are the invoice number, the date the invoice was issued, the due date, the total income billed on the invoice, the status of the invoice, and whether or not the invoice has been paid. You can also filter the invoices by status. The status of an invoice can be draft, paid, sent, overdue and archived. Click the three dots under actions to edit, archive, or delete the invoice. You can also change the status of an invoice here. To create a new invoice for the project, click “Add Invoice”.
Time tracking
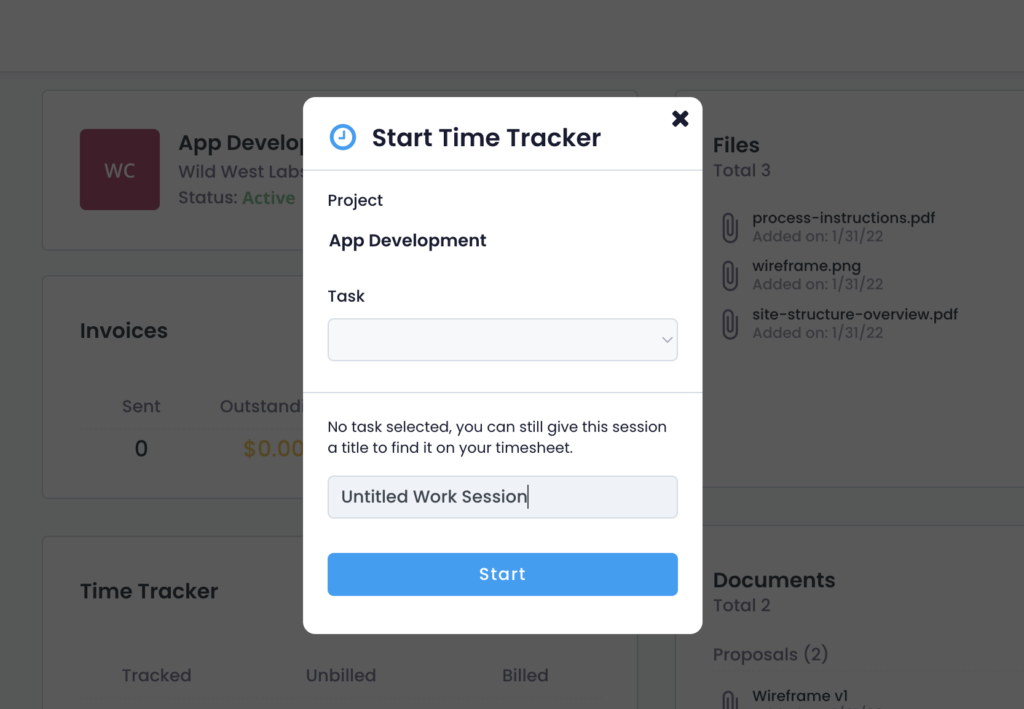
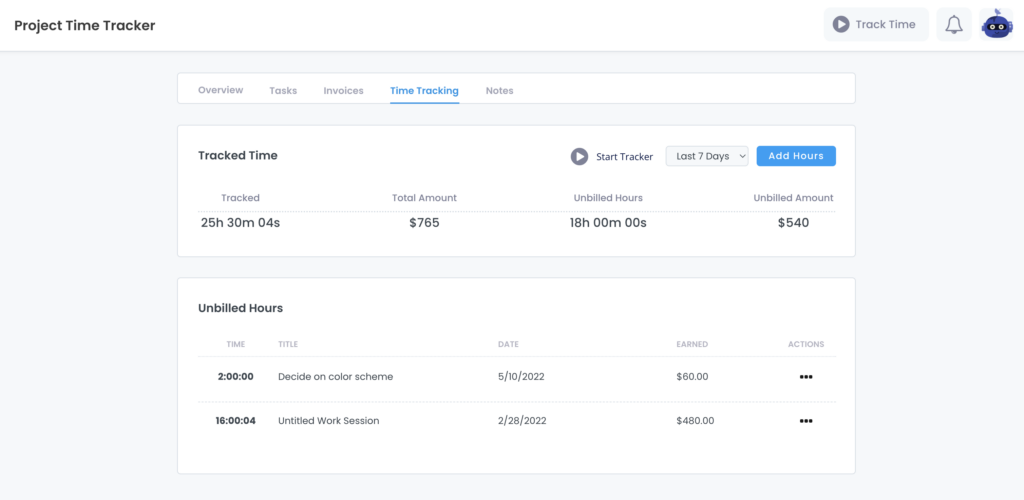
Get an overview of the time you tracked so far for the project via Time Tracking. See the total tracked time and unbilled hours. If you entered an hourly rate for the project, you’ll also see the total amount earned for this project as well as unbilled amount that you haven’t added to an invoice yet. You can start the time tracker by clicking on “Start Tracker”. Narrow done the timeframe by clicking on last 7 days and filtering by the last 30 days, this month, last month, this year, and last year. If you forgot to start a time tracker and want to add worked hours manually, simply click the “Add Hours” button.
Under Tracked Time is another section called Unbilled Hours. This is a list of tracked work sessions that haven’t been added to an invoice yet. You’ll see the time worked, the title of the timed session, the date of the tracked session as well as how much you’ve earned if you set an hourly rate under the project settings. By clicking the three dots under actions you can edit and delete a tracked worked session.
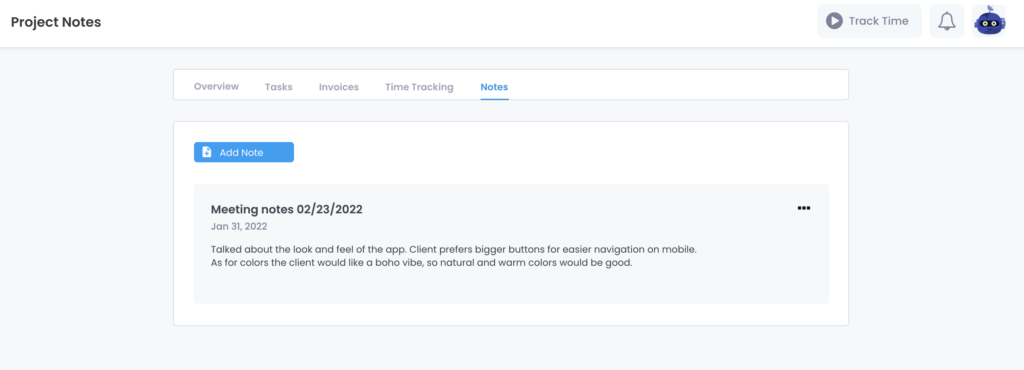
Notes
For easier access to all of the notes for the project, click on the Notes in the mini menu. Save anything you want to reference later for this project. Click “Add Note” to create a new note. By clicking on the three dots, you can edit or delete a note.