Create a new invoice by clicking the “New Invoice” button. You can create two types of invoices: Based on a project, or a manual invoice.
Creating an invoice based on a project allows you to add hours that you’ve tracked for this project on Kosmo. If you just want to create a quick invoice and manually enter the client and items, choose “Manual Invoice”.
After choosing the type of invoice, you’ll be asked to complete 4 easy steps,
The first step is some general information, like invoice number, sender name and address, and recipient name and address. If you chose to create an invoice based on a project and filled this information out in the client details, the information will be populated automatically. Also choose the currency, date issued, and the due date for your invoice.
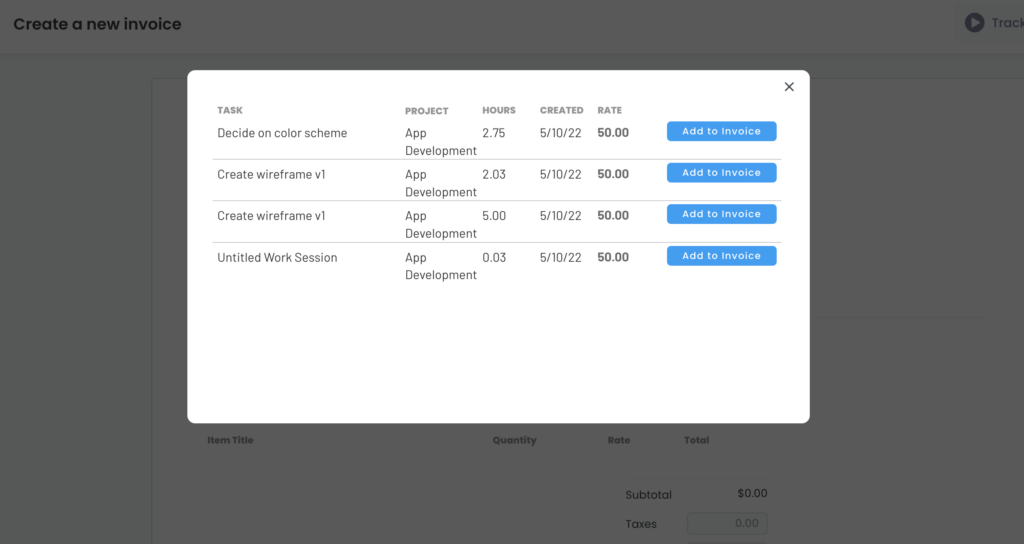
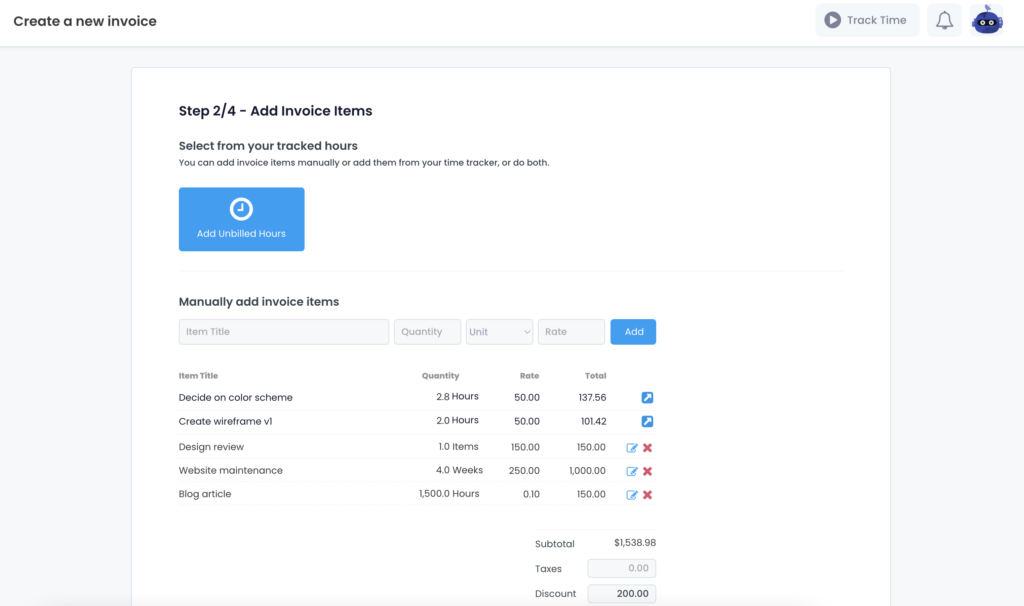
Step two is about your invoice items. You can either add invoice items manually or select them from your tracked hours. The second option is only available If you’re generating an invoice for a project and tracked hours on Kosmo. Click on “Add Unbilled Hours” and choose the time you’d like to bill from the pop-up window by clicking “Add to Invoice”.
To remove tracked time from your invoice click on the arrow next to it and click the red X icon in the popup.
If you realize that the rate you entered originally isn’t right, remove the items from your invoice and head back to your project to adjust the rate.
To add invoice items manually enter an item title, the quantity, the unit (weeks, days, months, items, hours, words), and the rate and click the add button. You can edit a manual invoice item by clicking the pencil icon or remove it completely by clicking the red x icon.
Finally, add any taxes that may apply and possible discounts. Once you’re happy with the invoiced items, click “Save and Continue”.
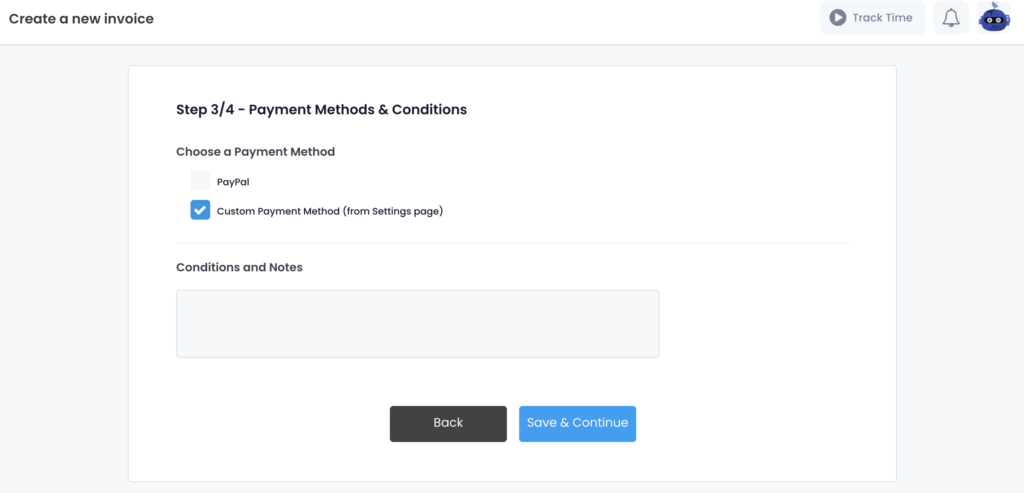
Choose payment methods & conditions for your invoice in step 3. The payment method options depend on the accounts you connected with Kosmo. You can add your Stripe and PayPal accounts via your settings. You can also enter other payment instructions. For example, if you prefer to get paid via Venmo, enter your info as other payment option in your settings. This option will show as “Custom Payment Method” when choosing your payment method on your invoice. Let your client know of any other information in the conditions and notes section and click “Save and Continue”.
In step 4, you can choose a style for your invoice. We offer different templates depending on how much branding you’d like to add to your invoice. Choose your favorite style and click “Preview invoice”. During this step, you can edit the style by clicking the “Edit Style” button. All templates can be edited to include your brand color. Some templates allow you to upload a logo and header as well.
Review your invoice and click “Save” to save the invoice as a draft. If you’re ready to send the invoice, click “Send Invoice”. Enter the recipient’s email and a message. Click “Send a Test Email to Yourself” or “Send Email” to send the invoice directly to your client.