After clicking the “New Contract” button and choosing the “Custom Contract” option, you’ll be asked to confirm contractor and client information. Choose if you and the client are an individual or company and enter the names and addresses. If you choose that you or your client is a company, you’ll be asked for the company name and title. If you already filled out this information in your settings and client details, the fields will be populated automatically. Click “Continue”.
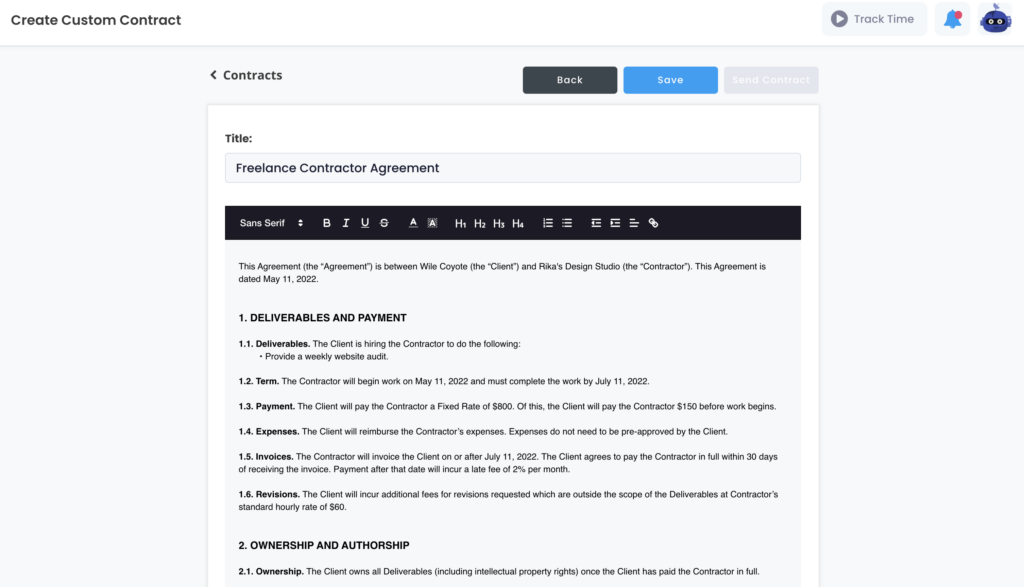
You’ll see the standard contract that can be completely edited. Use parts of the contract, delete sections that don’t work for your business, add new segments, or paste your own contract. You can style the contract. For example, choose different fonts, headings, colors and link out to external URLs.
Once you’re happy with the contract, click “Sign Now”. Click “Send a Test Email To Yourself” or “Send Email” if you want to send the contract right away to your client.